
How to Fix CPU Fan Errors
 CPU fan errors are very annoying. If you've ever experienced this error message, chances are it paralyzed your computer. Some systems prompt you to press "F2" to skip the reboot, but most computers shut down and reboot automatically, and there is little you can do to override the process. If the reboot does not fix the problem, the error will persist and your computer can perpetually boot and reboot until you unplug it from the wall. Fan errors are definitely serious, because a computer without a functioning CPU fan can overheat within a matter of minutes. An overheated CPU can become severely damaged, so the best course of action is to attack the cause of the fan error. Fix the fan, and you will also fix the error, allowing for a smooth, hassle-free bootup.
Instructions:
1) Turn off your computer and unplug it from the wall outlet. To access the fan area, open up the computer. Whenever you're opening up a computer case, make sure it is fully powered down for safety.
2) Unscrew the main access panel on your computer. This is typically located on the left-hand side of the computer tower.
3) Remove the access panel.
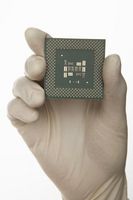
4) Locate the CPU fan. The CPU fan is typically smaller than the main power supply's fan. On the motherboard, you'll notice a small heat-sink fan blowing directly onto a 1-inch or 2-inch object resembling a microchip. This chip is your processor, and the attached fan assembly is your CPU fan.
5) Blow compressed air onto the CPU fan to remove any dust or debris that is clogging the fan.
6) Follow the cable running from the fan to its ending point on the motherboard. Sometimes, a fan cable can become loose and result in a CPU fan error. Reattach the cable if it is loose. Most CPU fans contain a small, three-pin connector that plugs directly into the motherboard. It is a truly unique-looking plug that is easy to find on the motherboard if the entire cable ends up falling out.
7) Close up the computer and screw in the access panel.
8) Plug in the computer and turn it on. If the computer still cannot boot up because of a CPU fan error, then your fan is completely dead. As explained by Inside My Laptop, CPU fan errors sometimes require completely replacing the fan assembly. If you've never replaced a fan before, take the computer to a professional. Botched fan-assembly replacement could cause unwanted CPU overheating, so it's best to seek a technician's help if unclogging and reattaching the fan cable did not sufficiently alleviate the error.


